

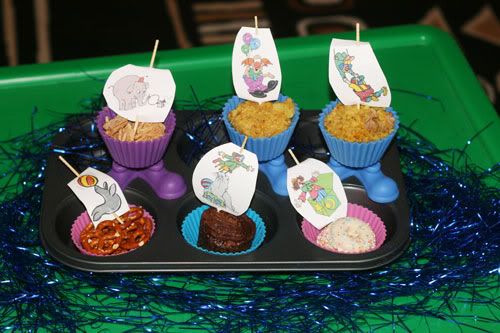
Here is my muffin tin for todays Circus Theme. Mondays have been such a busy day for us that I hardly have time to create my muffin tins.
For those of you who do not know how to make their own food picks here is how:
I printed out some free circus clip art that I found online (if you would like this clip art please let me know since I do have the combined cliparts saved).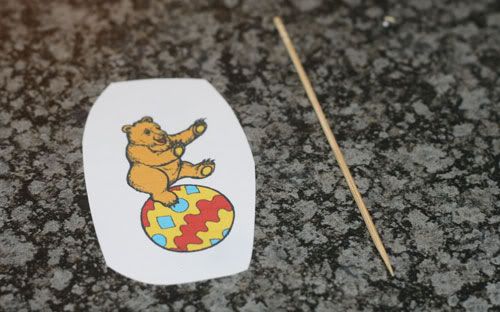 Materials: printed clip art and 1 toothpick , colored pick, or bamboo skewer.
Make two holes, one at the top and one at the bottom.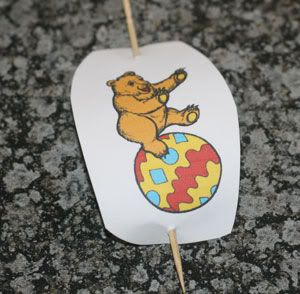 Then pierce your toothpick/skewer into the top and out at the bottom...
There ya go, quick and easy.
To fit into our circus theme I then printed out a Circus clown activity page from here. (That website is great, there are a lot of activity pages although I had just found it today so I haven't seen them all yet)
Since my son doesnt know how to color in the lines yet I just filled in the colors on the comp and cut them out for him. (hey, fun for me too!!)
Here is how I presented the activity: Here is our finished activity
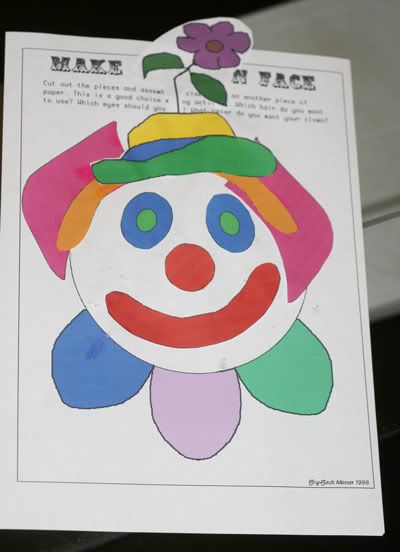
I cant wait to see what everyone else created for their Muffin Tin Monday Circus theme!
Monday, August 31, 2009
Make your own Food Picks and Muffin Tin Monday Circus

Animal Bookmarks

 Materials needed: Hard paper (like pastel board or cardstock), scissors, glue, pen, googly eyes(optional)
Draw the animal faces on the appropriate colors (sorry these 2 pics are blurry!). You can also print these from free clipart online.


Cut them out (since Deen is still young I did the drawing and cutting for him but for older kids they would enjoy creating this whole bookmark themselves).
Cut some strips of paper for the bookmark.
This is how I presented the activity to Deen (2 1/2 years old).He did the gluing and here is what we ended up with:
Variation: Instead of using googly eyes, draw in some eyes and then Laminate bookmarks for durability.
What is your favorite size of bookmark?
Saturday, August 29, 2009
Book Review and Giveaway
PicPocket Books sells books for your Ipod or Iphone that can be easily downloaded from ITunes. Children can enjoy reading and listening to books while on the move. I was excited when they asked me to review one of their books since IPhone books is a new concept to me. Just download from Itunes, transfer to your phone and you are good to go.
I downloaded the picture book called Tractors which is an educational book about different types of tractors. The text is highlighted while the book is being narrated by young children. The highlighted text is great for early readers since they can follow and read along. Tractors is part of their Big Stuff book range which is aimed at promoting early literacy in young children.
What I like most about their books is that you always have them on hand whenever you need them (well atleast for those of us who always carry their cell phone everywhere). There is no need to pack any books ahead of time to keep your kids entertained because all the books are conveniently being taken with you wherever you go. (Less mess, less chance of your book being dirtied or getting lost)
Deen refused to get into his carseat yesterday and I was in a major rush so I whipped out my Iphone which is ALWAYS with me and gave it to him to read the story. He immediately sat in his carseat since his curiosity was sparked. He loves to feel like an adult by using my IPhone so he felt very proud of himself for having a use for the phone too. He is also a major book lover so this was perfect to keep him busy.
My opinion on the particular book Tractor is that it is a good book for kids that are car lovers/ tractor lovers/wheel lovers. It would be great to add to your tractor theme but I think for the age of 2 1/2 I would prefer having a story like book since that is what interests my son the most. I am very eager to try out the other PicPocket books because I am in love with the concept of it.
My opinion on PicPocket Books is 5 stars. I love the convenient concept!
They have a book called "My friend Isabelle" which has great reviews and seems more story like. It is a true story about two kids (one that has down syndrome) and their usual Friday play date together. The book points out their similarities and slight differences in a way children can relate to and understand. The book shows children that everyone is different and differences are what make the world so great. I have not read this book myself but it does seem interesting.
The Giveaway:
PicPocket books are offering one of my readers(who owns an Ipod or Iphone) a free book from one of their current titles.
To Enter: (Mandatory)
Visit PicPocket Books and leave me a comment with which book you would like if you win
Extra Entries (Leave appropriate extra comments for each):
Subscribe to my blog in a reader. (1 entry)
Become a follower of mine. (1 entry)
Add my button to your sites sidebar. (1 entry)
Tweet about this giveaway. (1 entry. Leave link to tweet in comment)
Blog about this giveaway (2 entries. Leave link to blog entry in comment)
Purchase something from PicPocket Books before the giveaway ends (3 entries)
Giveaway ends September 11 2009 at 11.59pm. Winner will be chosen at random and announced on September 12, 2009.
*Disclaimer: I was not paid to give this review. The company offered me one of their books for free to review. This is my honest review on the product**
Kelleigh Ratzlaff $4 Gift Certificate Winner

The winner of the $4 Gift Certificate to Kelleigh Ratzlaff's store is ChicMama. Congratulations!
I will be e-mailing you.
Friday, August 28, 2009
Make A Volcano
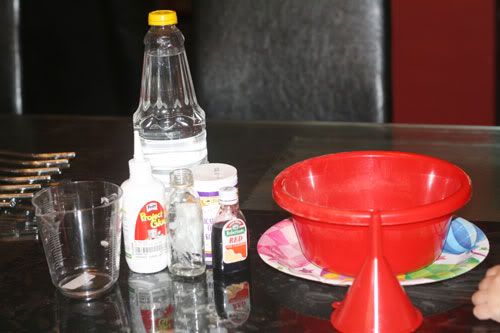
Materials Needed: Sand(its in the red dish), funnel, 2 glass or plastic bottles(i used 1 glass bottle and one pouring cup), red food coloring, vinegar, bicarbonate of soda, blue paper plate ( i didnt have a blue one)
Don't forget the eager child! :)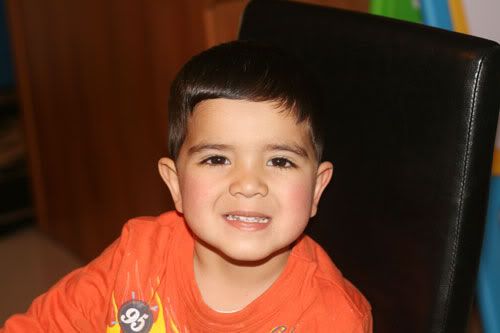
Mix some red food coloring with vinegar in the pouring cup.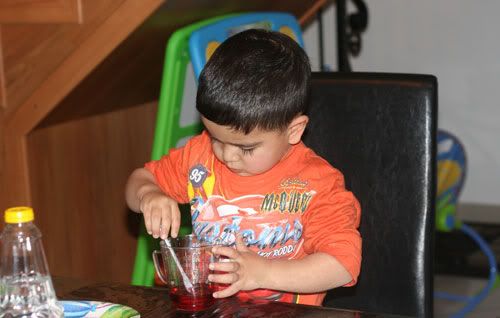
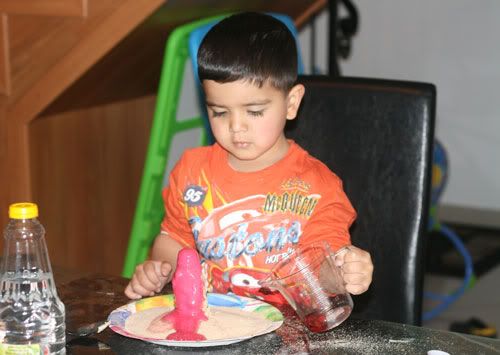
Add some bicarbonate of soda to the glass bottle (not the same bottle as the vinegar). Pour sand on paper plate with the bottle in the middle.
At this stage you should notice that I've been sleep deprived for the past few nights... yep the sand part...
In the book I had it said cover the bottle with glue so that the sand sticks to it... which I did... but umm... the rest of the sand wasn't sticking... (trust me... i REALLY couldn't figure that out lol but read on...)
Pour Red colored vinegar into the bottle (use a funnel if you need).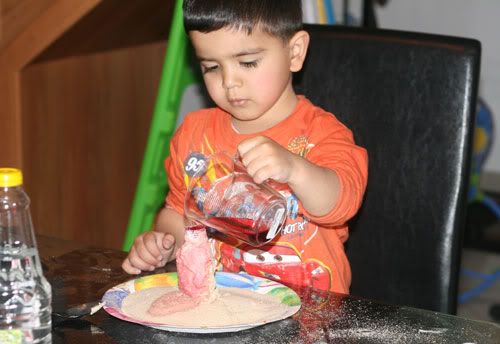
Move hand and cup away quickly!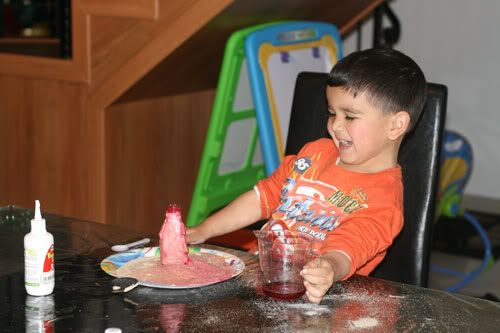
Oooh now THIS looks more like a volcano doesnt it.... It finally dawned on me...
(Note to self: being sleep deprived delays reaction time...)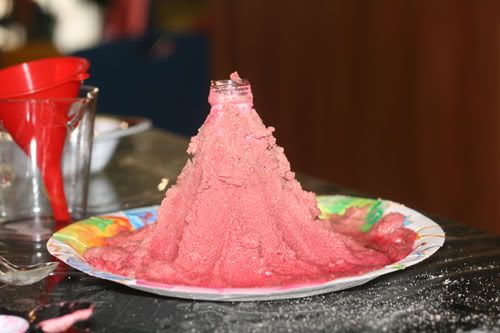
Moisten the sand! Then it will mould better....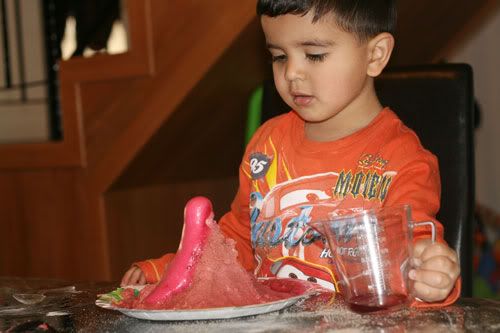
This project was probably Deen's favorite activity that I've done with him so far...
"Mama I LOVE this, can we do this again tommorow?" awww.. :)
Thursday, August 27, 2009
A Snowy Winter Scene

Since winter is almost over here we created a winter scene... (although we don't get snow unfortunately).
I found a tutorial for making this online but I completely forgot to save which website I found it from. How do you guys organise which project came from which website?
Anyway, heres how we did it:
Materials: Green colored rice (made the same way as colored salt), cotton balls, qtip, blue cardstock or board paper, glue, scissors, yellow construction paper (for sun).
Add Glue for trees. I helped deen make glue triangles with the glue and then he rubbed the glue around with a qtip. Sprinkle Rice over the glue and shake off excess rice into a bowl or some sort.
 Add glue to bottom of paper to add snow (cotton wool).
Cut a sun out of construction paper and place on paper.
What is great about this project is it is SO full of texture.. soft cotton wool... somewhat rough feel of rice ... :)
Wednesday, August 26, 2009
Marble Painting
We did marble painting trying different items to see which gave us the best results... here's pics of our experimenting: Materials Needed: Paper plate, paint, marbles, and a child full of energy.
Add a little bit of your paint colors to the paper plate (dont make it too thick otherwise the marble will get stuck and not move). Put the two plates together to close it, make sure their hands are placed correctly so the marbles don't slip out... and then...
Shake shake shake!
 We then used a paper cup and covered it with a small plate... Shake shake shake.
Then we rolled the paper cup in the paper plate to create a matching design And set it aside to dry.
We then tried using a bowl on top of the paper plate instead of closing it with another paper plate. This was by far the favorite because the marble rolled around nicely, it didn't slip out, and the sound effects were great.
Deen then tried to balance the marbles on the plate without a cover.... It takes skill for a young child! Marble painting was a great way to shake off excess energy.
Tuesday, August 25, 2009
Catch A Ball Tutorial

This is a cheap and easy toy that you and your kids can make.
Materials needed:
Plastic/styro cup
String
Scotch Tape (or equivalent)
Ball
Pierce hole through middle bottom of the cup.
Thread string through leaving a little excess string at the bottom of cup. Tape the string to the bottom. Tape other emd of string to ball and let you or your child have fun trying to flick the ball up and catch it with the cup.
 Sorry that the pics are a bit blurry!
We did this at Deen's playgroup this week and it was a lot of fun.
Monday, August 24, 2009
Monster Finger Puppet Giveaway
I was browsing etsy when I came across these adorable monsters at Happycloud Thunderheads Shop!

Are these not the most gorgeous monster finger puppets?!
I'm so in love with them and its definitely on my wish list! I think my son would adore these!
Lucky for us, Daniel from Happyclouds Thunderhead's shop has offered to give one of my lucky readers a custom set of monster finger puppets!
You can choose to build your own monster puppets according to your childs specs, or be surprised with the mystery pack!
(Because the eyes are made of buttons they are not recommended for children under 3 but why not request for the kids safe embroidered eyes option for younger kids?)
I can see lots of time spent storytelling and a lot of imaginative play with these.
To Enter(Mandatory Entry):
Visit Happycloud Thunderheads shop and leave a comment here telling me which monster is your favorite in the shop.
Extra Entries (Leave appropriate extra comments for each):
Subscribe to my blog in a reader. (1 entry)
Become a follower of mine. (1 entry)
Add my button to your sites sidebar. (1 entry)
Tweet about this giveaway. (1 entry. Leave link to tweet in comment)
Visit Happycloud Thunderheads blog and leave a comment mentioning you're here from Fun With Mama (1 entry)
Participate in my Unleash Your Creativity McLinky (2 entries)
Blog about this giveaway (2 entries. Leave link to blog entry in comment)
Purchase something from Happycloud Thunderheads Shop and mention my blog (3 entries)
I cant wait to see pics of the lucky winner using these!
Giveaway ends September 7, 2009 at 11.59pm. Winner will be chosen at random and announced on September 8, 2009.
Good Luck Everyone!
Sunday, August 23, 2009
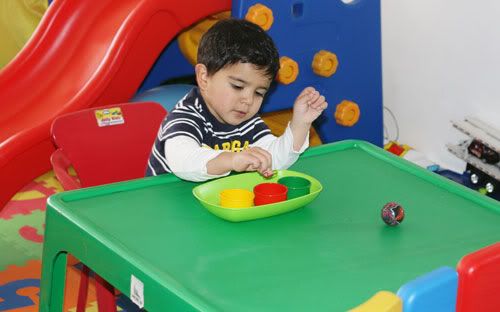
Paper Clips Sorting and Baking for Daddy
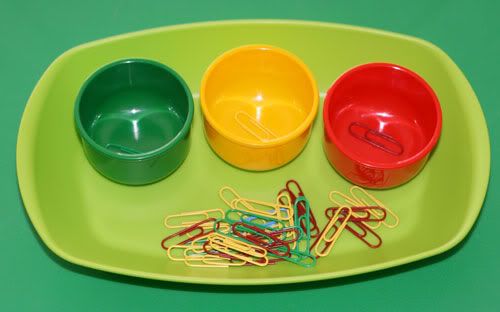
We sorted out paper clips by color...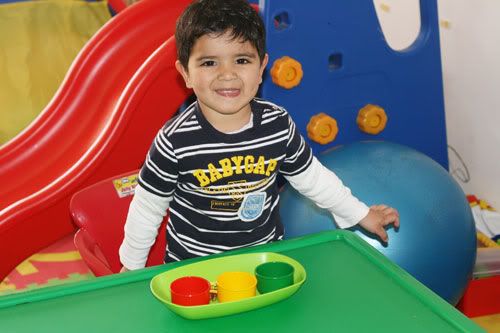
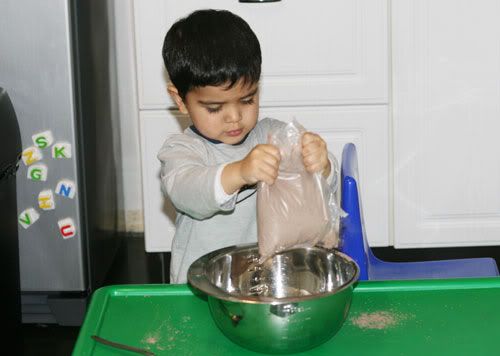 We did this baking activitiy on Wednesday for his Daddy's Birthday (Happy Birthday Daddy! from Deen.)
I held it back to Sunday so that we could participate in Simply Made Sunday.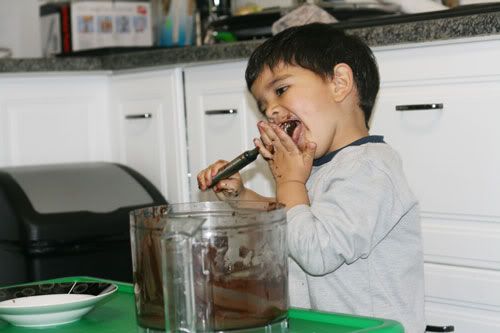
The mix was SOOOO yummy I think I ate Deen ate the equivalent of one cupcake!
(hey, I wasn't the one caught red handed now was i?)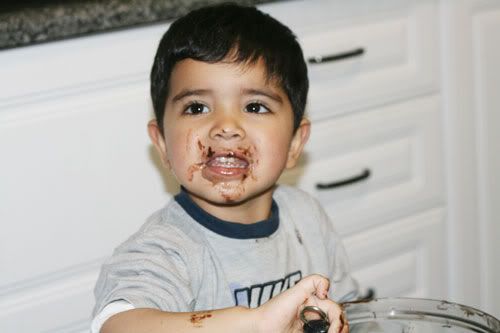
Awww that picture makes me smile... THIS is why I bake with my son :) :)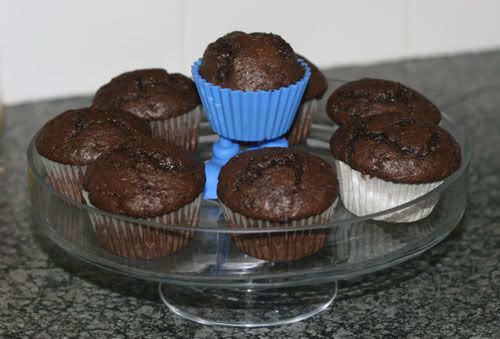 I wish we made more, they were delicious!
Saturday, August 22, 2009
Unleash Your Creativity
As mothers, sometimes we get so busy trying to enrich our childrens lives and help them tune into their creative side that we often forget about ourselves. I've decided to start a McLinky blog carnival to gather all of our projects together so that we can inspire others to feed their own creativity.
This week I did a few crafts for myself and feel more relaxed and accomplished.
Here's some of the things that I did:
Recycled Fabric Box
(this isn't a perfect method, just a quick moms guide to making something work quickly)
I opened a package I received in the mail full of ribbons I had ordered. I had absolutely no idea where to put them or how to store them. I thought I'd try something new so I cut the box it came in to a size I thought was right. I then cut out some cheap fabric (I did cut extra since I had no idea how to measure this part and I figured the extra could go towards the bottom...
 i mean who would really see that part?)
Glue or add double sided tape to outer sides of the box, inner sides of box, and bottom (i skipped doing the outer sides of the box since it wasn't necessary)
I used a pin to create my corners the way I liked them and then attached them to the bottom of the box with tape.
This is what I ended up with:
This is by no means the right way... just a way to do something I needed as quick as can be... I am definitely looking for ways in which to make this the "right way" since I do receive a lot of packages and I really like this recycling storage method, it is really useful! :)
If you have a link to other fabric box wrapping techniques please leave a link in the comments section.
I also made a crayon roll in my post below
If you haven't done anything this week then try to find time to do your own craft activities so you can inspire other mamas as well as relax and give yourself a break! :)
Rules to enter:
Make sure to include a link to this post in your entry.
How did you unleash your creativity this week?