Showing posts with label tutorial. Show all posts

Tuesday, February 23, 2010

Dyeing Playsilks


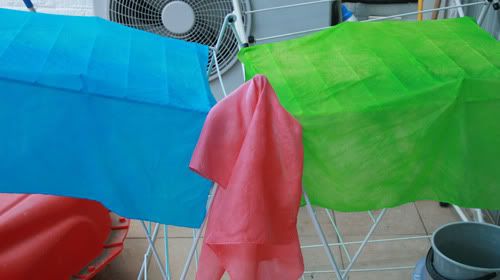
We dyed playsilks using Kool-aid using three different methods.

(The Kool-aid we used to dye the above were:
Blue - 4 packets berry blue
Green - 4 packets Lemon Lime
Pink - 3 Packets Pink Lemonade
You can vary the darkness of the shade based on how many packets you use.
)

First you will need to purchase blank playsilks. I purchased these Habotai scarves from Dharma trading in these sizes:

21" by 21" (which is the smaller pink one- great for babies) and 35" by 35" (which is a great general size for a playsilk).

While you wait for these to come in the mail go buy some unsweetened Kool-Aid and some vinegar. (Gloves would also be a good idea! If you don't have gloves then do what I did... put your hand in a ziplock bag)
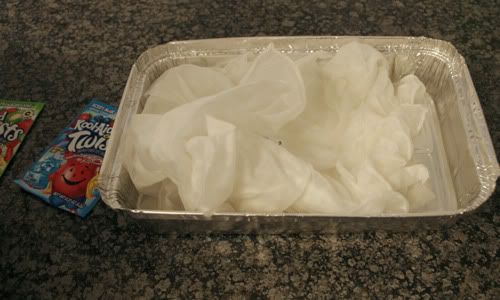


Pre-soak your play silks in water for 30 minutes and add a 1/4 cup of vinegar.

How to dye play silks:

I tried three different methods to dye the playsilks.

First Method:
Using another silver container (like the one I used to soak the playsilk in) I added 3 packets of pink lemonade and added boiling water(from my kettle). I made sure to mix it in and then placed my silk scarf in. The pink scarf measured 21" by 21" so it fit appropriately in the container.
I left it in for a few minutes until the water it was soaking in turned clear. (Maybe 3-4 minutes). I then rinsed it out and surprisingly no color ran. Laid it out to dry and it looks great.


Its the perfect size to play peek-a-boo with Aaliya.

Method Two: On the stove.
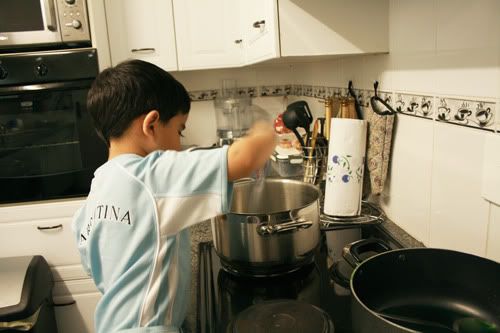
Add 3 Kool-aid Packet to pots.
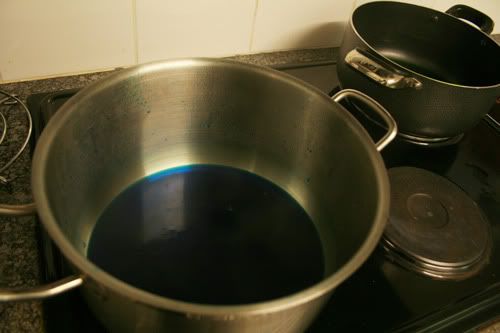

Add a little bit of hot water to mix the color in. Let it simmer for a minute while you wring out your play silk from the pre-soak.
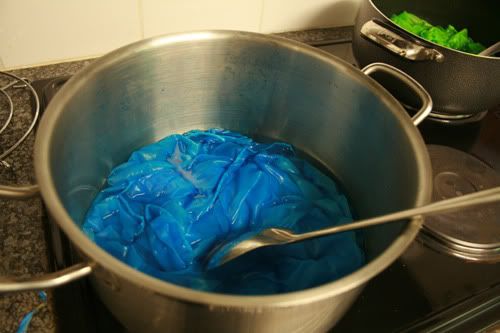

Add in your play silk and hot water to cover the silk. (Its important to remember that the more water you add the lighter the color will be. You will need enough water though to make it dye evenly).

Turn the heat down to medium and mix every so often.
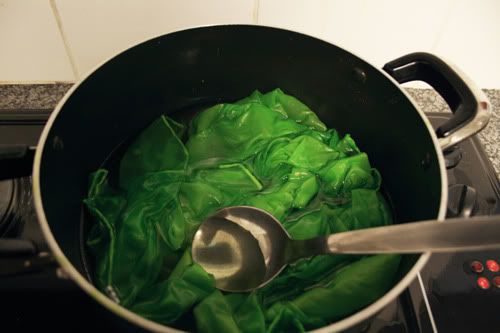

When the water turns clear-ish (after about 20 minutes) and it looks like the play silk has sucked in all the color you can take it out and rinse it until the color stops running. (Again, mine didn't run at all)
Hang to Dry.
As you can see the green didn't dye evenly, it took on a bit of a tie dye look. A lot of people prefer it that way since it looks pretty.
Me? I'm not really sure which look I like better...

The dye took on a tie dye approach because the silk was scrunched up when I put it in the pot. If you like it like that then use a smaller dish/pot. If you want it even then use a bigger pot or add your play silk slowly making sure to get even coverage.


Method Three: Maybe this should be called method one and a half since the only difference is that I used a large cookie sheet...



Anyway,
Since I wanted the blue to be more even(after dyeing it on the stove) I added one more packet of berry blue to a large cookie sheet, added some hot water(enough to cover the silk) and I placed the playsilk evenly in. (It was sort of flat like how you would fold a blanket).

It dyed beautifully and very even. The light spot in the pic above on the blue is the sun.
(I'm sure this can be done without using the stove like in Method One).

There are many different ways this can be done. One of which is by using the microwave. I plan to try that in the future since I ordered A LOT of play silks and have many colors to try.

Have you made playsilks? I'd love to see so we can get ideas on colors :)

Tuesday, February 9, 2010

Crawling Knee Pad Tutorial - Sewing

Materials Needed:
Fabric (i used a woven cotton),
nursing pads (or cotton knit , fleece, bamboo/cotton velour, or any fabric for padding), elastic

Aaliya started crawling 2 weeks ago(8 months old) and I was worried that the tiles on the floor would be a bit hard for her to crawl on. It is still really hot here so she isn't wearing pants all that often. I looked online for a tutorial to make some crawling knee pads but I couldn't find any.... so I attempted it myself.

Please remember that i'm still new at sewing so this may not be the 'right' way to do it... but it is the way that i did it.


First , I decided to use some old nursing pads to use as the padding part (you can easily substitute this for 2-3 layers of another fabric like knit, bamboo/cotton velour, anything that will give padding. Just cut them in desired circle size and sew the layers together)

I measured my nursing pads and then created a circle picture in photoshop elements..(i made the circle 4 by 4".) I cut that out then cut 4 layers of my printed fabric.

I measured around Aaliya's thigh area and knees and subtracted an inch for the elastic.

I cut my elastic at 6.5 inches and 5 inches.
I used Fold Over Elastic because it was pretty and soft but if I had to make these again I would use normal elastic since it wouldn't be as slippery on pants.

The fold over elastic doesn't stitck to the pants since it is so soft so the knee pads move around a little. This would definitely be remedied by using normal elastic which has a tighter hold.
Place two fabric circles right sides together and insert the elastic leaving a little on the edge as shown in the pictures.

Sew around using a 1/4 inch seam allowance and leave enough place for turning AND for stuffing the padding in. (Don't forget to remove pins while sewing). I stitch a few times(backstitching) over all elastic area to reinforce the elastic.


Trim the excess... (make sure not to cut through any stitching)

Turn over and stuff padding inside, you should be left with something that looks similar to this...(but obviously prettier since u probably have more sewing experience than me hehe)

Tuck in the edges of the area u left open and topstitch around the whole thing. (Make sure to use the same color thread for this part so that it looks neat)


I then did a heart applique on a blank shirt... It was my first time using the satin stitch and second time doing applique.. its fun! I made a matching fabric flower too.


And she's off!

(yep... I can see that...
NOTE: Do Not Use Fold Over Elastic... use REGULAR elastic.
Reason:the knee pads will roll up as in the pic above.. next time I will make sure to use normal elastic)

I know that kids don't have knee caps yet but it is a light layer of padding and I do think its a little more comfortable for them. Sort of like crawling on carpet.


I hope you found this useful :) If you know of any other way I'd love to hear it since I think these are pretty cute and unique. I would love to try it again.

Monday, August 31, 2009

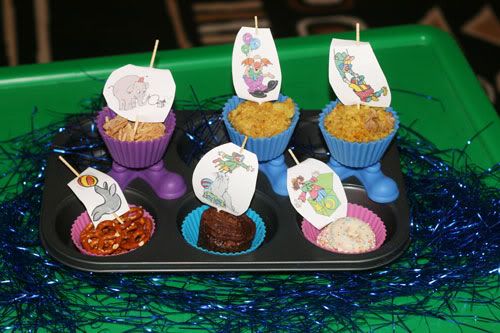
Make your own Food Picks and Muffin Tin Monday Circus


Here is my muffin tin for todays Circus Theme. Mondays have been such a busy day for us that I hardly have time to create my muffin tins.

For those of you who do not know how to make their own food picks here is how:

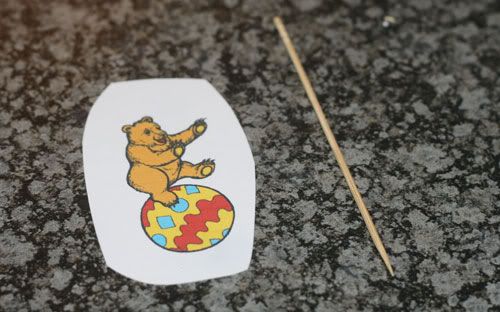
I printed out some free circus clip art that I found online (if you would like this clip art please let me know since I do have the combined cliparts saved).

Materials: printed clip art and 1 toothpick , colored pick, or bamboo skewer.

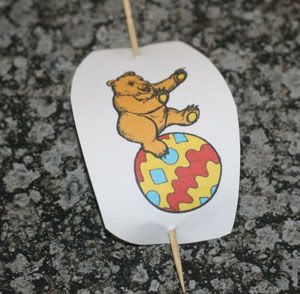
Make two holes, one at the top and one at the bottom.
Then pierce your toothpick/skewer into the top and out at the bottom...

There ya go, quick and easy.

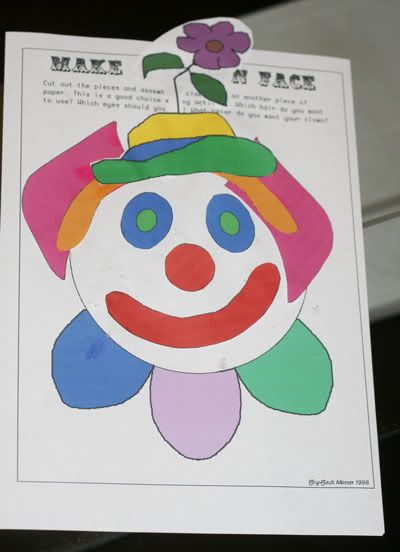
To fit into our circus theme I then printed out a Circus clown activity page from here. (That website is great, there are a lot of activity pages although I had just found it today so I haven't seen them all yet)

Since my son doesnt know how to color in the lines yet I just filled in the colors on the comp and cut them out for him. (hey, fun for me too!!)

Here is how I presented the activity:

Here is our finished activity


I cant wait to see what everyone else created for their Muffin Tin Monday Circus theme!

Animal Bookmarks


Materials needed: Hard paper (like pastel board or cardstock), scissors, glue, pen, googly eyes(optional)

Draw the animal faces on the appropriate colors (sorry these 2 pics are blurry!). You can also print these from free clipart online.


Cut them out (since Deen is still young I did the drawing and cutting for him but for older kids they would enjoy creating this whole bookmark themselves).
Cut some strips of paper for the bookmark.

This is how I presented the activity to Deen (2 1/2 years old).
He did the gluing and here is what we ended up with:

Variation: Instead of using googly eyes, draw in some eyes and then Laminate bookmarks for durability.

What is your favorite size of bookmark?

Thursday, August 13, 2009

Cool book tutorial and our first giveaway!


Today I made a really boyish shaped board book for my son and boy was it easy! Let me show you how:

I downloaded this really cool quickpage album from Kelleigh Ratzlaff Designs. The album comes pre prepared, all you need to do is add your pictures and print. I then adhered it to chipboard...
here, have a look at this quick tutorial:

After adding my own journaling and pictures (you don't need to add journaling, thats optional) I printed it out on HP advanced photo paper (glossy)


Then you cut...
Glue cut pieces to chipboard...I used a tape runner and some permanent glue...


Cut again with your scissors....

(Don't forget to glue the backs to the pieces after you cut them out...)

Use a sand block to smooth down messy edges...

Punch holes on the hole marks (i used my crop-a-dile big bite)... and embellish as you like :)

I would have preffered to use binding rings but i didnt have any ... so I used a pipe cleaner and embellished it with a pretty ribbon..

Here are the pages inside:


That stamp is his real foots stamp at birth..


The Giveaway:

Would you like to win this boy quickpage album? Or how about a $4 gift certificate to Kelleighs store?
If you have a little girl, she has this gorgeous template album.


Kelleighs store is full of easy printable templates of boxes, albums, a pencil case, and so much more!

Heres how to enter(Mandatory entry):

  • Go to Kelleigh's store and leave a comment here telling me which item is your favorite in her store.
For Additional entries leave a comment for each of the following:
  • Become a follower of my blog (1 comment entry)
  • Subscribe to my newsletter through e-mail or RSS feed (1 comment entry)
  • Grab my button and post it on your blogs sidebar (3 comment entry)
  • Add me to your blogroll (1 comment entry)
  • Post(blog) about this giveaway linking to this post (3 entries. Add link to comment)
  • Go to Kelleigh's blog and leave her a comment telling her you've come from Fun With Mama (2 comment entries)
  • Purchase something from Kelleighs store. (2 entries)
  • Follow me on Twitter (1 comment entry. Let me know your twitter name in comment)
  • Tweet about this giveaway (2 comment entries. Add link to comment)
This giveaway will end August 28th 2009 at 11.59pm est.
To use kelleighs products you need a photo editing program (like photoshop, photoshop elements, paint shop pro, anything with layers. You can get a free photo editing program here)


This giveaway is now over

Thursday, August 6, 2009

Create your own stamp


Today we created our own name stamps. This was very easy !

Materials Needed: Popsicle stick(or tongue dispensers), foam alphabet letters(if you dont have this you can use alphabet cookie cutters on foam sheets), and glue.

All you need to do is glue your name on the popsicle sticks... make sure you do the letters upside down so that they show correctly when you stamp it... (mirror image)... see my example:


stamp away! :)

Wednesday, July 29, 2009

Fuzzy Pipecleaner Rainbow


Today we made a Fuzzy Pipe cleaner rainbow that can be hung anywhere.
Materials needed: Pipe cleaners, tape, cotton balls, and string

First we taped down the colors together on cardboard paper.

Then we pulled the rainbow downwards to make a rainbow shape and taped again...

We then glued cotton balls to hide the tape and look like clouds...

You can stop here if you like, it looks pretty as is now but I wanted to hang this beautiful rainbow up so we carried on ...

We cut the rainbow out, punched a hole on the top and attached a pretty silver pipe cleaner through...
You can also use string here instead of the pipe cleaner..


and yes I know I have my colors wrong.... red should be on top and blue on the bottom ;)

Blog Widget by LinkWithin