Tuesday, February 23, 2010

Dyeing Playsilks


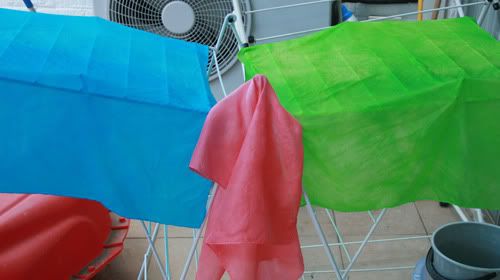
We dyed playsilks using Kool-aid using three different methods.

(The Kool-aid we used to dye the above were:
Blue - 4 packets berry blue
Green - 4 packets Lemon Lime
Pink - 3 Packets Pink Lemonade
You can vary the darkness of the shade based on how many packets you use.
)

First you will need to purchase blank playsilks. I purchased these Habotai scarves from Dharma trading in these sizes:

21" by 21" (which is the smaller pink one- great for babies) and 35" by 35" (which is a great general size for a playsilk).

While you wait for these to come in the mail go buy some unsweetened Kool-Aid and some vinegar. (Gloves would also be a good idea! If you don't have gloves then do what I did... put your hand in a ziplock bag)


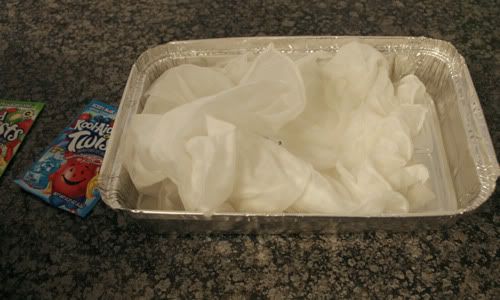
Pre-soak your play silks in water for 30 minutes and add a 1/4 cup of vinegar.

How to dye play silks:

I tried three different methods to dye the playsilks.

First Method:
Using another silver container (like the one I used to soak the playsilk in) I added 3 packets of pink lemonade and added boiling water(from my kettle). I made sure to mix it in and then placed my silk scarf in. The pink scarf measured 21" by 21" so it fit appropriately in the container.
I left it in for a few minutes until the water it was soaking in turned clear. (Maybe 3-4 minutes). I then rinsed it out and surprisingly no color ran. Laid it out to dry and it looks great.


Its the perfect size to play peek-a-boo with Aaliya.

Method Two: On the stove.

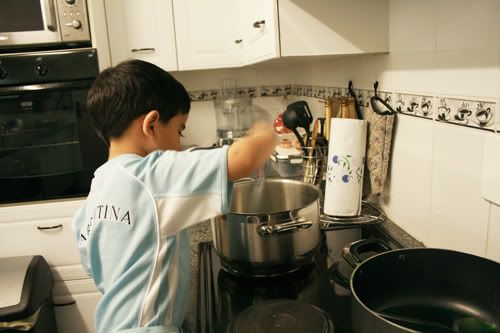
Add 3 Kool-aid Packet to pots.


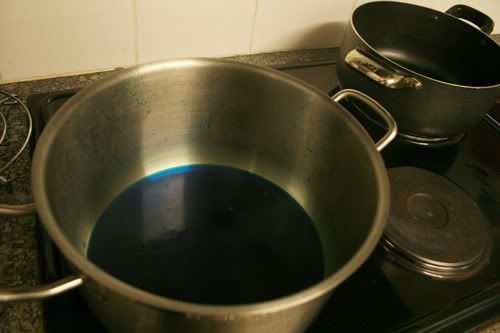
Add a little bit of hot water to mix the color in. Let it simmer for a minute while you wring out your play silk from the pre-soak.


Add in your play silk and hot water to cover the silk. (Its important to remember that the more water you add the lighter the color will be. You will need enough water though to make it dye evenly).

Turn the heat down to medium and mix every so often.


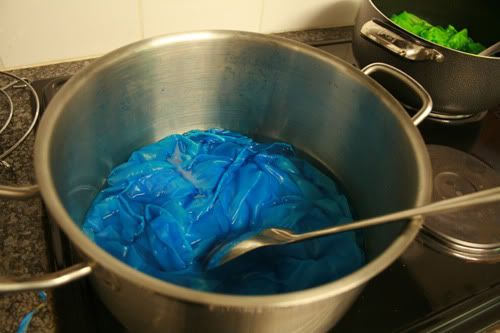
When the water turns clear-ish (after about 20 minutes) and it looks like the play silk has sucked in all the color you can take it out and rinse it until the color stops running. (Again, mine didn't run at all)
Hang to Dry.
As you can see the green didn't dye evenly, it took on a bit of a tie dye look. A lot of people prefer it that way since it looks pretty.
Me? I'm not really sure which look I like better...

The dye took on a tie dye approach because the silk was scrunched up when I put it in the pot. If you like it like that then use a smaller dish/pot. If you want it even then use a bigger pot or add your play silk slowly making sure to get even coverage.


Method Three: Maybe this should be called method one and a half since the only difference is that I used a large cookie sheet...


Anyway,
Since I wanted the blue to be more even(after dyeing it on the stove) I added one more packet of berry blue to a large cookie sheet, added some hot water(enough to cover the silk) and I placed the playsilk evenly in. (It was sort of flat like how you would fold a blanket).

It dyed beautifully and very even. The light spot in the pic above on the blue is the sun.
(I'm sure this can be done without using the stove like in Method One).

There are many different ways this can be done. One of which is by using the microwave. I plan to try that in the future since I ordered A LOT of play silks and have many colors to try.

Have you made playsilks? I'd love to see so we can get ideas on colors :)

Wednesday, February 17, 2010

ClickinMoms Coupon Code

Clickin'Moms

After starting my blog I realised how important taking good pictures are in terms of quality of posts. I had purchased a digital SLR camera previously hoping to take better pictures of my kids. 2 weeks ago I came across Clickin' Moms.

ClickinMoms is a closed private forum for mothers to share their experiences in photography. It is a great forum for a beginner photographer, a hobbyist, and even advanced photographers. There is a great community there who are so helpful. There are great resources to teach you how to get your camera off of AUTO and into manual mode. The best part about it is that it is a private forum so you don't have to worry about your pictures being stolen or way too many people seeing pictures of your kids. Only members have access to the forum.

Inside the forum you will find tutorials, product reviews, contests, inspiration, group picture play (where you put a picture up and members edit the picture for you), challenges and more.

I was a bit hesitant to join since it wasn't a free forum and because I wasn't sure if I was ready to take the plunge into spending more time with digital photography. Having a blog and being a mom really takes up a lot of my time but after reading the many great reviews I took the plunge and purchased a membership. I have only been there 2 weeks and have yet to go through all the rich information shared there but I have made a goal to read at least one tutorial a week.

The atmosphere is very warm, friendly, and helpful. I have also started a photography course here in South Africa. It is a 5 week course which I am so excited about. Watch my pictures in the next few months to see how I hopefully progress and learn to take better , sharper pictures.

Since Clickin' Moms currently has a coupon code and since I know that a lot of my readers are moms and some bloggers themselves I thought I'd let you guys know about it as I am very happy there and very eager to learn more about my camera. It'd be great if we can learn to use our cameras together and take better pictures of our children that we can look back on many years from now and be proud of.

To Join: Click the image or click here: Clickin' Moms
Use Discount code: "FRIEND" at checkout to receive 10% off your subscription.
Coupon code expires March 31, 2010.

www.ClickinMoms.com

In the upcoming weeks I will do another post about my progress there.

Oh, and for my blog I have been using my point and shoot recently. You can definitely see which pictures were taken with my SLR and which were taken with my point and shoot. I am going to try my best to take pics mostly with my SLR now.

I have yet to put up a picture that I shot in manual mode and without a flash until now, here is one of my first pictures:


It definitely would have been better with only my son in the image but hey I was too busy working with my settings to actually check who popped up into the pic lol.

Here is precious picture of my baby girl(not shot on manual and with a flash):


I can't wait to look back on these pictures in the next few months and see how much I've learned ...

I hope you have an amazing day today!

If you join Clickin' Moms please let me know so I can look for you there ;)

Tuesday, February 16, 2010

Ladybug Fingerprint Painting


After yesterdays lady bug craft I decided to try a lady bug art project. This activity proved to be fun AND messy!


Materials: Red and black paint, 2 paper plates. *Red colored rice is optional*

Cut the circle(head) and antennas out of one paper plate. Leave the other for the ladybug body.


Paint

Pause and say, "I Love You Mama!"

Paint the body red and the head black.

Dip your childs fingers in the black and have them make fingerprint spots.

Glue on head and antennas.


Add colored rice... because Deen likes to add colored rice to everything... it's his favorite part! :)

And there you have it... a pretty ladybug!


"Deen! No! Don't rub your eyes!!"

Uh Oh....


That is what Deen looked like after....

and this was me afterwards...


Note to self: NEVER do art without an art apron... :)

But then Deen came to me and says "Mama... I had so much fun"... and that made it all worth it :)

Monday, February 15, 2010

Ladybug Cut and Paste Activity + Printable

I made a Ladybug Cut and Paste Printable activity for Deen and my readers today. This activity can be made easier or harder depending on your child's age. I've included 3 pages to this activity.

The first page is for the youngest kids, just cut and have them place the spots wherever they want on their ladybug.

The second page requires more concentration and precision. You want them to place the dots on the white spot as best as they can.

And the third page is if you have a child like mine who wants more spots! :)

Click here to download/print this activity.

Print the page that you would like to use or print them all.

I suggest printing on "Fast Normal" to minimise on ink usage.

The one on the left is printed as "Fast Draft". It uses the least ink but the picture doesn't look very nice. The one on the right is printed on "Fast Normal" and the colors look great.


I then cut out my circles with my 1" scrapbook circle hole punch(it made this so quick and easy!). If you would like to practice on your child's cutting skills here would be the time to give them a pair of scissors and have them cut the circles out as best as they can.


Then glue the dots to the ladybug.

After we were done with this activity Deen had fun cutting out extra circles by himself


I hope you find this printable fun and useful for your child. :) Enjoy!

For more fun printable ideas check out Abc and 123

Marble Maze Review and giveaway


Cuddlebug Kids sent us some marble mazes to try out and review. It is basically a marble placed between two very soft pieces of material in a maze form. The idea is to manipulate your hands/fingers to move the marble from one area to another all without actually being able to visually see the marble. This is an excellent hand toy/fidget that is great for concentration. It makes a wonderful car toy, grocery store toy, basically anytime you would like to keep your kids busy this would be a great toy to take along.

"The marble maze series gives kids something fun to do with their hands to help busy minds stay focused"

Fruity Twist Marble Mazes:
The Serpentine maze zig zags back and forth (lemon/lime)
The Double S maze has a mirror image zig zag with 2 marbles to manipulate at the same time (tangerine/lime)

Have you ever found yourself subconsciously doodling in school while your teacher was talking? I used to do that but just because I was doodling, doesn't mean I wasn't paying attention.

Deen really enjoyed trying to figure out the marble maze.

Cuddlebug kids handmade "products help provide structure and sensory support to kids with ADHD, Asperger's Syndrome, PPD-NOS and Sensory Integration Disorder." That is no limitation though as I find their products to be great for kids without the above disorders too!

Although I don't have one of her gorgeous weighted stuffed toys it is definitely on my wish list!

and... that is not on my wish list for my son... I want it for myself!
It looks so cozy! :)

"Weighted animals can help little nervous systems calm down enough to participate in story times, circle time, and other seated activities. Sitting on a child’s lap or being carried around the classroom or home, Lovie can help provide deep muscle input to calm little ones."

Cuddlebug Kids has offered one of my readers the chance to win a set of marble mazes!
Read on to learn how to enter.

Mandatory Entry: Visit Cuddlebug Kids Store and leave me a comment here telling me which item interests you most.

Extra Entries(leave appropriate comments for each extra entry):
Visit Cuddlebug Kids Blog and leave a comment (1 entry)
Subscribe to my blog in a reader. (1 entry)
Become a follower of mine. (1 entry)
Add my button to your sites sidebar. (1 entry)
Tweet about this giveaway. (1 entry. Leave link to tweet in comment)
Post about this giveaway on facebook. (1 entry. Leave a link to your facebook page)
Blog about this giveaway (2 entries. Leave link to blog entry in comment)

This giveaway will end at midnight on Sunday February 28, 2010. Good luck to all my readers!

*Disclaimer: I was not paid to do this review. I was given a free product to try and to review honestly.*

Tuesday, February 9, 2010

Crawling Knee Pad Tutorial - Sewing

Materials Needed:
Fabric (i used a woven cotton),
nursing pads (or cotton knit , fleece, bamboo/cotton velour, or any fabric for padding), elastic

Aaliya started crawling 2 weeks ago(8 months old) and I was worried that the tiles on the floor would be a bit hard for her to crawl on. It is still really hot here so she isn't wearing pants all that often. I looked online for a tutorial to make some crawling knee pads but I couldn't find any.... so I attempted it myself.

Please remember that i'm still new at sewing so this may not be the 'right' way to do it... but it is the way that i did it.


First , I decided to use some old nursing pads to use as the padding part (you can easily substitute this for 2-3 layers of another fabric like knit, bamboo/cotton velour, anything that will give padding. Just cut them in desired circle size and sew the layers together)

I measured my nursing pads and then created a circle picture in photoshop elements..(i made the circle 4 by 4".) I cut that out then cut 4 layers of my printed fabric.

I measured around Aaliya's thigh area and knees and subtracted an inch for the elastic.

I cut my elastic at 6.5 inches and 5 inches.
I used Fold Over Elastic because it was pretty and soft but if I had to make these again I would use normal elastic since it wouldn't be as slippery on pants.

The fold over elastic doesn't stitck to the pants since it is so soft so the knee pads move around a little. This would definitely be remedied by using normal elastic which has a tighter hold.
Place two fabric circles right sides together and insert the elastic leaving a little on the edge as shown in the pictures.

Sew around using a 1/4 inch seam allowance and leave enough place for turning AND for stuffing the padding in. (Don't forget to remove pins while sewing). I stitch a few times(backstitching) over all elastic area to reinforce the elastic.


Trim the excess... (make sure not to cut through any stitching)

Turn over and stuff padding inside, you should be left with something that looks similar to this...(but obviously prettier since u probably have more sewing experience than me hehe)

Tuck in the edges of the area u left open and topstitch around the whole thing. (Make sure to use the same color thread for this part so that it looks neat)


I then did a heart applique on a blank shirt... It was my first time using the satin stitch and second time doing applique.. its fun! I made a matching fabric flower too.


And she's off!

(yep... I can see that...
NOTE: Do Not Use Fold Over Elastic... use REGULAR elastic.
Reason:the knee pads will roll up as in the pic above.. next time I will make sure to use normal elastic)

I know that kids don't have knee caps yet but it is a light layer of padding and I do think its a little more comfortable for them. Sort of like crawling on carpet.


I hope you found this useful :) If you know of any other way I'd love to hear it since I think these are pretty cute and unique. I would love to try it again.

Blog Widget by LinkWithin