

These handprint plaques are a great keepsake as well as a great gift for grandparents.
Here is how to make these simple and cheap handprint plaque keepsakes:
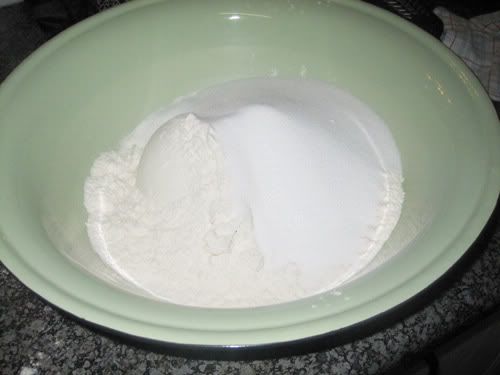
Mix 1 1/2 cups salt and 4 cups flour in a large bowl. Gradually add about 1 1/2 cups of water(i used 2 cups) until dough forms a ball around the spoon.(I mixed with my hands).
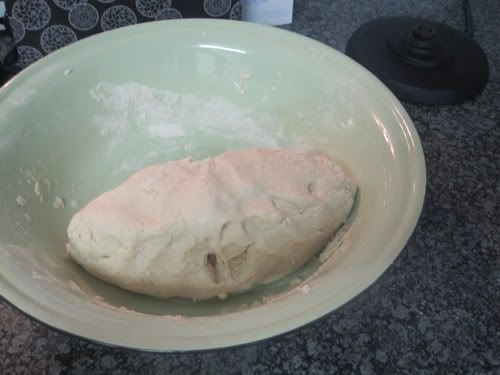
Knead the dough with your hands until it looks right as seen above.
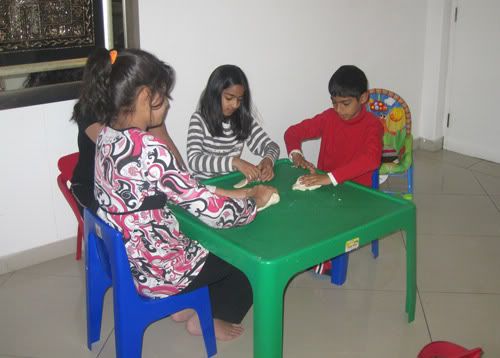
 We wanted our plaques to be in circles/ovals so we just shaped them by hand.
Then place childs hand into the dough until their handprint remains. Attach a paperclip to the back of the dough.
Place them on a baking sheet.
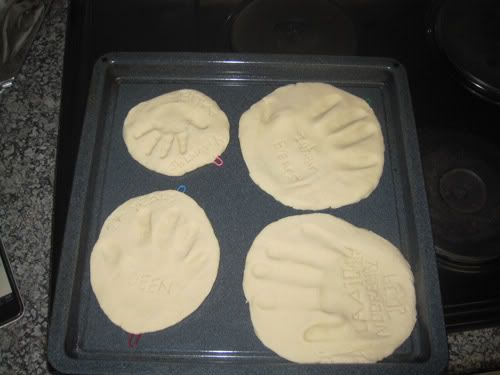 Bake on 250 degrees in the oven for 30 minutes to an hour or until dry.
When done paint with acrylic and embellish as desired.
 Let the paint dry then String ribbon through the paperclip to hang it up.
If you make this I'd love to see it! Leave the link in the comments section so others can see it as well.
We found this recipe at kids craft magazine.
Wednesday, September 30, 2009
Handprint Plaque

Tissue Paper Mosaics

Todays Open ended art theme was egg shells or tissue paper mosaics.. so we went with tissue paper... Looking at these pictures especially the tree .. I am truly amazed at kids creativity.

Go to Growing and Learning by Leaps and Bounds to see what others did for the open ended art mosaic theme.
Giveaway Winner - Coco Loco Felt Designs

According to random.org our lucky winner is.... Comment #28....
Beth (Finding Mephitees)... Congratulations Beth!!! I will be emailing you asap! :)
(unfortunately my program screen hunter is not working in order to do a screen capture)
Thanks to everyone else who entered and a special thank you to Coco Loco Felt Designs for donating a product for this giveaway!
Tuesday, September 29, 2009
Lets go fishing! (+ printable)

This fun and easy to make fishing game provided us with a lot of fun today. This activity is great for hand/eye coordination.
Materials needed: paper plate, foil, paper clips, dolly pegs or any type of stick (or even an old marker), blue card paper (i used poster board paper), string, and small magnet.
First print out the fish images on cardstock (or normal paper and laminate). Print two copies so that there are more fish. Ive included a fish printable here![]()
 Fold your blue paper in half then in half again. Cut along the folds/creases.
 Wrap foil around plate and tape blue paper pieces together till it fits right.
** You can use glue now if you like to secure the foiled paper plate to the blue paper (optional) Cut out fish pieces and write their points on the back. I used 1 and 2 points and just chose them randomly.
Add paper clips to the fish.
I used a dolly peg as the fishing stick and tied a piece of string around it as well as around a small magnet.
(For younger kids make the string shorter than for an older child since it is easier to control with a shorter string.)
You can use a stick from outside(twig), old marker, or even an old magnetic fishing game stick that you have lying around instead.

At the end of the game have the kids tally the points at the back.
This activity was inspired by The Ultimate Craft book
Monday, September 28, 2009
Bumblee Bee Fingerprints

Today we made fingerprint bumblebees.
Materials needed: Black construction paper, yellow tempera paint, toothpick , white chalk, and tiny fingers :)
(ok... it doesnt have to be tiny... mamas can do it too!)
Have your child dip their finger into the yellow tempera paint and press that onto the black sheet. Do this as many times as you want bumblebees. Then take a toothpick and make two scratches (so you basically are scratching off the paint).
Add wings with chalk :)
Thursday, September 24, 2009
Water Color Fun
We did two water color activities:
1) Salty Watercolors from Marryann Kohls First Art Book
2) Open ended watercolor art!
Salty Water Colors:
Materials Needed: Card stock(I generally use card stock for art projects), water colors, paintbrushes, water, glue, salt
In the picture above, each child is on a different step (minus the waiting of course... that's the hard part hehe)
Step 1: Add glue to your paper in the design you want.
Step 2: Sprinkle salt Above and then tilt salted paper back into salt dish to get rid of excess salt.
Step 3: Wait for it to dry for a little bit of time... blow it... talk..chat... for like 2 - 3 minutes.(You don't have to wait for it to dry but I find that it comes out better if you do)
Step 4: Touch your paintbrush that has watercolor on it to the tip of the salt on your paper to watch the colors spread.
 "Mama, my sleeves are too tight!!!"
Here are the finished pictures:
Deen's is the one on the upper left corner... i have absolutely no idea where his salt disappeared to???
When these were dry they look BEAUTIFUL... they are very glittery and sparkly!
After this we did some Open ended watercolor art...
Wednesday, September 23, 2009
Playdough, Colored Pasta and Rice Fun!
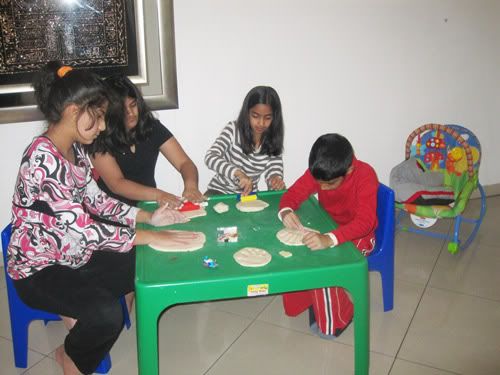
Today's Open Ended Art theme was Playdough/clay and mosaics. This activity was SO much fun because Deen had his cousins over to play. Its a nice change to be doing open ended art with older children. Their concentration is so much better and they really enjoy themselves.
My only regret is that we didn't use clay... these would be so pretty and I have no idea how the homemade playdough is going to look once dry.. I don't think it can be used as a substitute to polymer clay :( :( :(
It would have been nice then for the kids to have something to take home to show their parents and display in their homes...
We cut out shapes of playdough using playdough/cookie cutters.
Then I placed some colored pasta and colored rice (it can be made the same way as colored salt) on the middle of the table
Here is mine:
See how hard they are all concentrating

 Here is Deen's finished project:
And Laaiqah's tree and snowman And Zuhair's Bear
Check out Growing and Learning By Leaps and Bounds to see what others did this week in open ended art.
Tuesday, September 22, 2009
Three Little Pigs Play Set

After I was inspired by this project at Frugal Family Fun and DLTK Teaching we decided to try our hand at creating a three little pigs story set to go with our finger puppets.
Here's how we did it:
Since I did not have any milk cartons I used Kelleigh Ratzlaffs Milk Carton Template.
If you don't have Kelleighs template you can use milk cartons and then print out these three pig house textures. You just need to cut/glue them onto your milk cartons. (or collect things from outside like Valerie did at Frugal Family Fun blog)
Kelleigh includes two different sizes of milk cartons, one tall and one short. I then combined(clipped) the brick/straw/stick paper to the template and printed out which was really easy.
The difficult part was finding suitable backgrounds! I created some easy to download house texture files. You can download these by clicking here or by clicking on the image Then I cut and scored on appropriate lines
 and folded and glued
If you don't have Kelleighs template you can use milk cartons and then print out these three pig house textures. You just need to cut/glue them onto your milk cartons. (or collect things from outside like Valerie did at Frugal Family Fun blog)
Don't forget to add doors and green felt for grass!
Since I had the three pigs finger puppets I didn't need to make the pigs and wolf themselves but those can be made by printing out three pigs and a wolf images from google.
Or make these toilet paper roll pigs at Dltk Kids. They've even got the wolf! :)
Or print these, have your kids color and glue them to popsicle sticks :)
As another activity we then we printed a piggy face mask that I made and cut out the circle. You can download that here:
If you need to make the hole bigger just cut into the pink until it is the appropriate size.
Deen had a lot of fun being the wolf and blowing me down while I wore the piggy mask.
This was our first time participating in STart (a blog hop of crafts linked to books.)
Thursday, September 17, 2009
Sewing and my first painting!

I tried some first time sewing projects this week. I did some applique work, added a ruffle butt and made some bibs. Sewing is so much of fun!! I've been having such a hard time with Aaliya's bibs getting way too wet and going through her shirt since she is at the teething age. The solution: add waterproof pul to the back of the bib...
Now her bib is waterproof. And here she is modeling her new outfit:

The bib pattern I used seems to make a bit of a wide bib... which I think will keep falling on top of her face (since she isn't sitting yet) so I plan to make another bib using a pattern that isn't so wide.
And.... I finished my first painting a few weeks ago!!
I didn't take art in school because I knew I couldn't draw. I didn't want to bring down my gpa because of that. (Since I had like a 3.8 gpa which is good!)
I do regret that now though because I really would have learned a lot and I would discovered my own love for painting! (maybe thats why I do so much painting with my son...)
So anyway... here is my first painting: I've hung it in my dining room :)
For the ruffle butt onesie I used this tutorial.